3D scanning and printing//
Designing from 2D to 3D
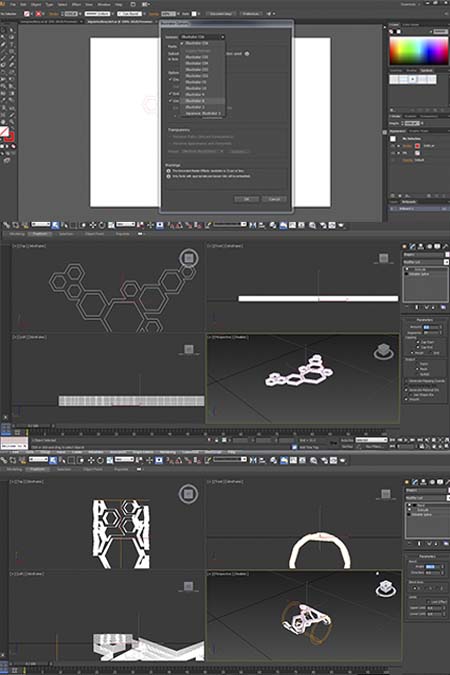
The software that were used to trasform a 2D organic shape into a 3d circular bracelet were first illustrator and after 3d studio max. Normally, 3d studio max is used for upgrated design but in our case we need the bend modifier which is not yet available to fusion 360. The illustrator file was saved into an old version, cause is the only one which collaborates with 3d max (illustraor 8 or earlier). After imported as an illustrator file the oblect was extruded it and then the bend modifier was aplied. The parameters of the extrude and bend modifier were extrude modifier +0.2 and bend axis x ,360 grade angle.
From 3D design to 3D printing.
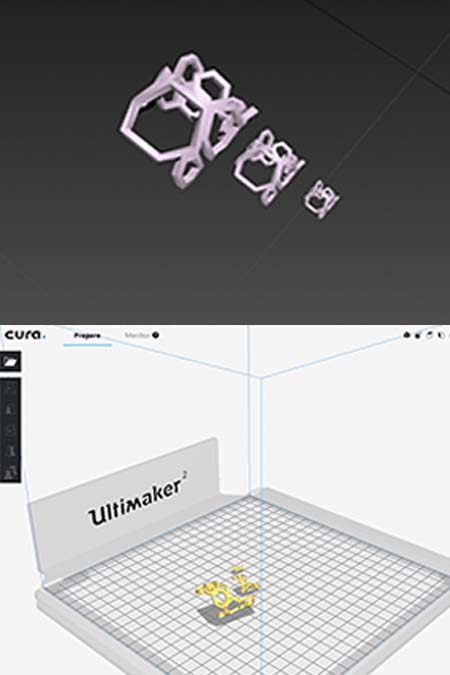
The concept of this test to to test the printing limits of 3 different 3d printers. The ultimaker 2, 3 and the formlab 2. This organic, circular shape was chosen because of its douple complexity. An organic bee cells shape of different dimention bended 360 degrees the same time. The challenge of the printers is based on the quality of the print, the material performance and the construction material. 3 different shaeps were chosen. The frist is tiny with a 0.5 diameter, the second 1,5 diameter and the third 2,5 diameter.The first test was placed on ultimaker 2. The material used was the glowfit of colorfab.
Cura software and materials.
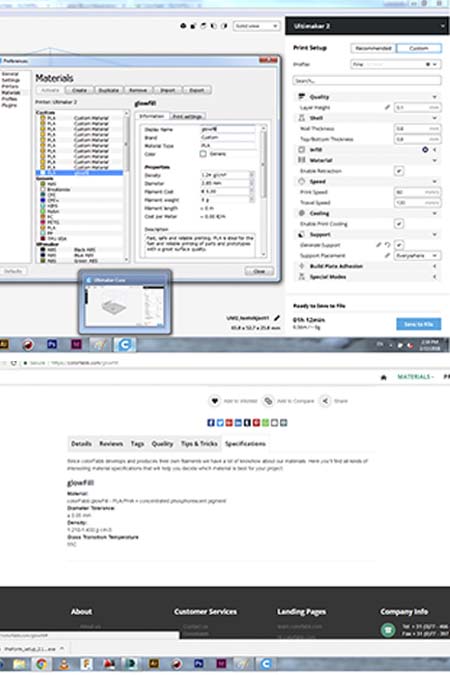
The real success of a 3d print lies on the material and ontherest of the printing parameters. The most important before send the stl file to the printer is to study a lot about the parameters and the characteristics of the material you want to use. In our case i chose the glow fill of color fab cause is not so simple as the normal pla and the same time is not so complicated as the ninja flex. In the website of color fab someone can find the material with all the printing information such as reccomented speed, temperature rate etc. I applied all these parameters and the file was ready for the printer. In this case the glowfill was not in the material list so i had to create and import a new material.

3D printing the organic shapes
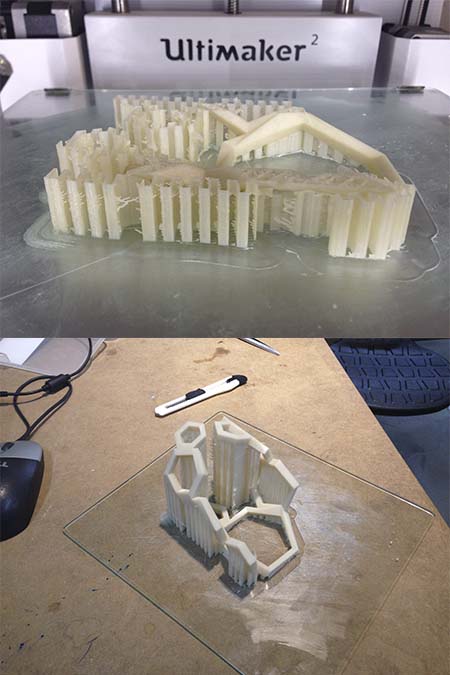
After putting the right settings also in the printer (by following the instructions), the printing started. I requires extra attention on the first layers of printing. In our case the 3 items have a lot of construction material and it was the first one to be leveled. After 1 hour the prints where ready and they were different results according to the size of the item. The two smaller were almost impossible to get separated from the constuction material. The bigger one after a lot of cleaning was separated but was still very fragile.I do not recomend the 3d print of organic circular shapes of small diameters > 2.5cm in ulimaker 2, mainly beacuse of the amount of the construction material.
3D printing an 6 diameter organic shape.
The next step is to check the 3d printing of a bigger organic item and how this can separated from the suport material after without to be damaged. The printing settings were exactly the same as the first, triple test and the material was agian the glowfill. After 6 hours of print the procedure was over and a big , stable item was inside a big mass of support material. In this case was easier to remove it since it was not so strong as the main body but in the end it requires a lot of effort to remove and it leaves a lot of material on the main item. Therefore, i do not recomment the ultimaker 2 for organic shapes.
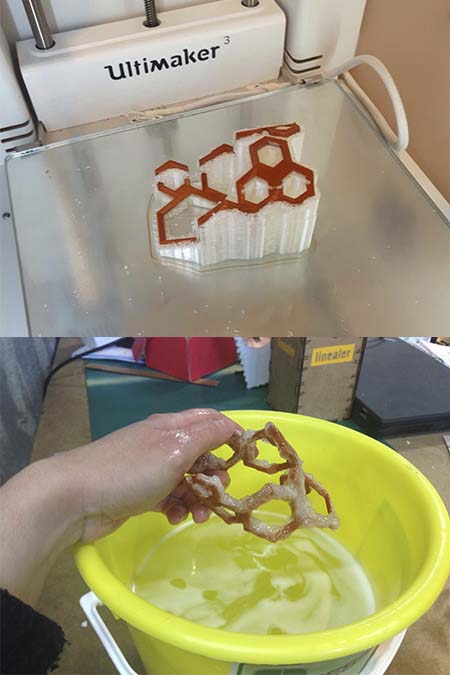
Ultimaker 3 and PVA material
The next test was in ultimaker 3 were it can print with two different materials. The first material was a normal pla and the second one was the pva which desolves in the water. This combination is the best in the case of complicated organic shapes since the pva material is used as support material and can be easily removed after without damaging the main item. The pva should stay in warm water more than 5 hours.
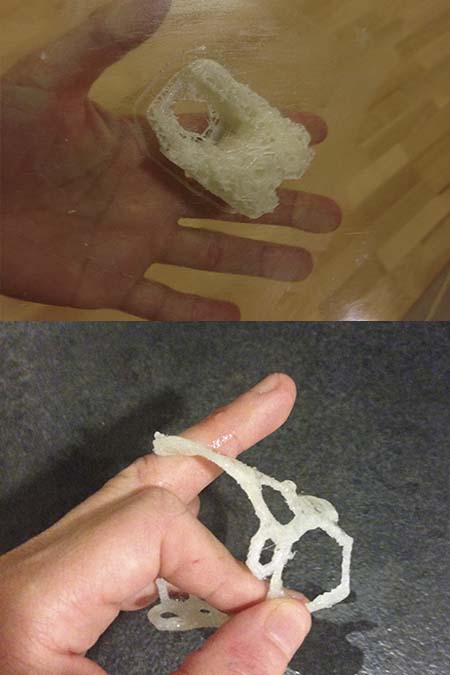
Ninja flex cheeta experiment
The next experiment was to check the ninga flex material or the ninja flex cheetah in the ultimaker 3 since this kind of flexi materials are recommented for organic shapes. The ninja flex was very hard to work together with the pva in the ultimaker 3 so after a lot of studying online i used the cheetah one which had also a lot of flexibility. After following the right instructions and parameters for the specific material and printer the final product was very flexible and not fragile at all. The only disanvantage was the quality of the print. After consulting some tutorials, this is something that often happens in ultimaker 3 with the combination og flex materials and pva (support material).
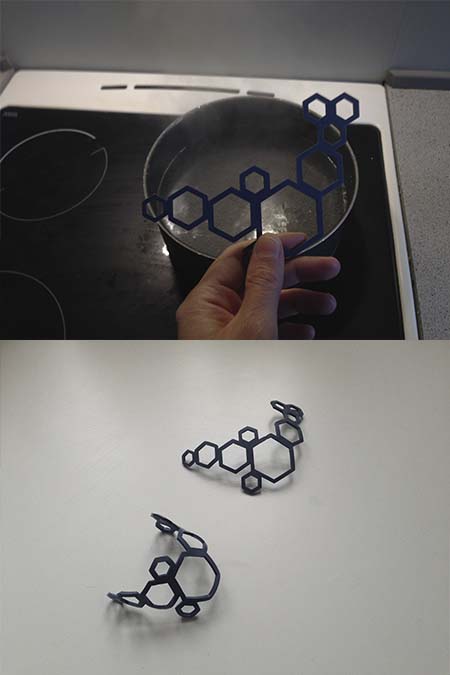
Post 3D printing experiments
The experiment has to do with bending a pla 3d printed item by using boiling water. Indeed, it just takes some second for the pla material to bend and is this exact point where it can be formed and shaped again. Plastic protected gloves are necessary and smeone has to be very careful with the boiling time. In the end, th item is placed into cold water and becomes solid again. The result of course differs according to the original shape and form. In tis case a 360 bend is not recommended but a slight bend is accepted.
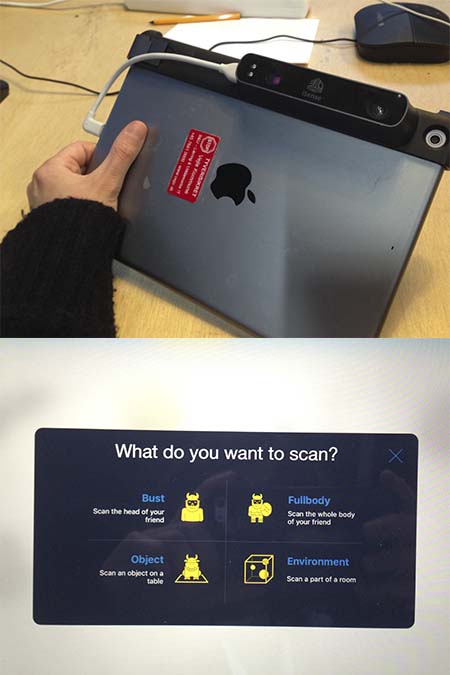
3D scanning
The software that was used for 3d scanning was the itseez software and a special isense camera. Its integrated design makes it easy to capture every dimension of objects on the iPad or iPhone. The compact snap-on design of iSense instantly transforms the phone into a 3D scanner. The itseez software gives four different scanning options according to the nature and the dimentions of the item. In our case the boost option was chosen to scan a body part and the item option was chosen to scan a flip flop.
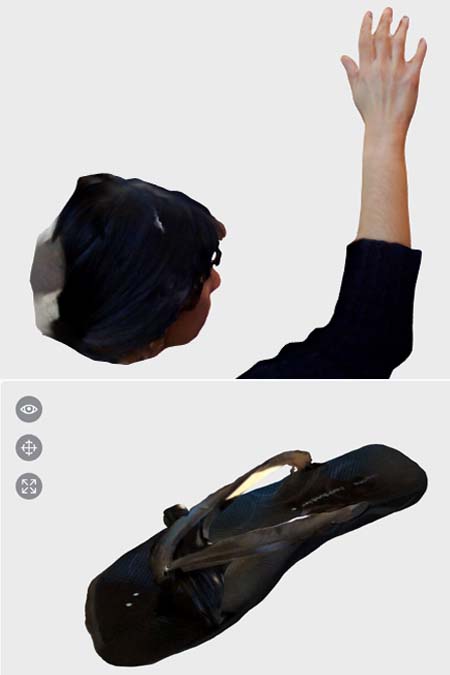
3d scanning results
The scan really depends from the light contrast and the material color. Shiny days and materials are not the best for this kind of 3D scan. They were scanned two items, a hand and a black flip flop. The secret of a good 3d scanning is to stay stil and to move around an imaginary circle on a stable rythme. The results of the two scan were very different because of the different color and texture. The body part succeded while the black shiny texture was not 3D scanned in a proper way.
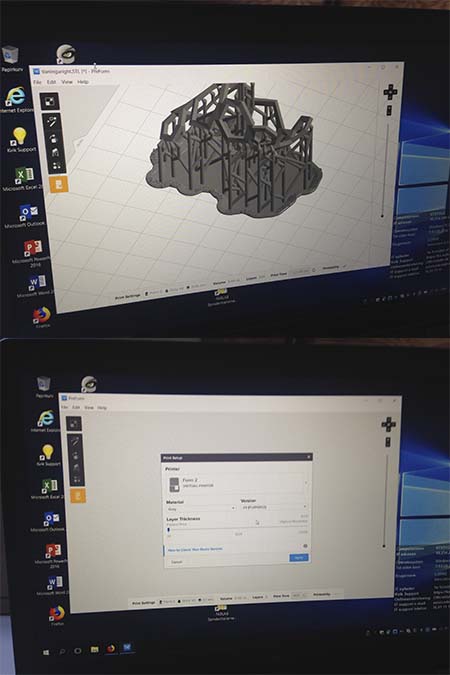
Preform software
The last 3d print experiment was tested to formlab 3d printer. This kind of 3d printer works in an completely different way from the ultimaker ones.Formlab follows a stereolithography (SLA) 3D printing procedure and works by curing resin with light. The laser makes solid the liquid resin via a process called photo-polymerization and forms the oblect layer by layer. Currently, SLA is among the most accurate forms of 3D printing used by a lot of profesionals. The printing and material parameters were set from the preform software i easierand faster stepsfom the ultimaker printers.
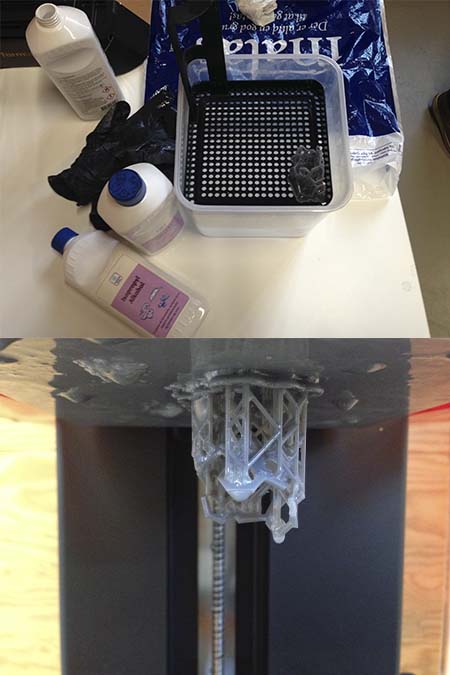
Printing with formlab 3d printer
THe printing of the 2 diameter circular organic shape took aproximatelly 3 hours and half an hour of warming and preparation(raisin warming). The screen informs about the temperature and the layers of the printing procedure and the printing occurs upside down. In the end of the printing some postprinting procedure are needed such as dip the object in to pure alcohol for a period of time (20 minutes).